Tuesday 31 December 2013

Australian Summer at the Beach :-) MDS layout


So this is Summer in Australia... it's December and for us that means swimming, BBQs, beach fun and Holidays.  School is out until the end of January, and we get to do lots of Summery things.

Last week I took the kids to the beach not far from home and we had fish and chips and went to check out the rock pools.  I took this photo of myself and my daughter... and it screamed "Scrap It" to me. We don't have that many photos of us together... and its so nice to have this one.

I adore how quick and easy it is to create beautiful scrap pages with MDS. Now to print it out....

Playing with Scraps


This card came together in just a few minutes... I had been chopping up my Sweetheart Treat Bags to use as background paper (as you do) and decided that punching a few circles from the scraps might be a good idea. I did a bit of background stamping and played with the arrangement of the circles until I was happy with it, added the banner from the Sweetheart Treat Bags kit, and a sentiment. And it was done. Quick and simple.

The background stamps are "Field Flowers" (the Sentiment), "Happy Day" (the Flower Motif) and Gorgeous Grunge (the stripes and splatters). The silver is our Silver Glimmer Paper. The colours are Pool Party and Real Red.

Sometimes quick and easy is all you need.

In case I don't get back here today.... a HAPPY NEW YEAR to all my readers and friends. I hope that 2014 is an awesome year for you all. xxx See you NEXT YEAR!


Monday 30 December 2013

One-Day-Sale.... My little Adhesive Special


So my kids and I had an amusing conversation in the car yesterday about how today is "New Year's Eve Eve".  Well if its the day BEFORE New Year's Eve... then that's what it must be. And to celebrate this momentous occasion... I am offering my customers a little one-day-only special...A BUY-3-AND-GET-ONE-FREE special on adhesive. I know this is the time of year when most people stock up on their adhesive and other basics, so I thought that my awesome customers deserve a little incentive.

You can choose any adhesives from page 174 and 175 of the Annual Catalogue... buy any 3 adhesives of your choice, and get the fourth one free. The only condition is that the free one needs to be the same or a lesser value than the other 3 adhesives. I had a couple of ladies ask me over the Christmas break whether I had any snail on order... well here is their chance to get some and it will save you a little on your stocking up of Adhesive.

Please note this is a little thank you special for my customers - it is not available as a special from Stampin'Up directly. And it is only available TODAY, 30th December 2013.  To order you need to get in touch with me before 9pm today (EDST).  You can click HERE to send me an email, or you can call me, or you can contact me via my Facebook Business Page.

Today's card is another Sale-A-Bration Sneak peek... I hope you enjoy it.


Sunday 29 December 2013

Follow your Heart - with Sweetheart Treat bags for background paper


Just a simple little card today. I repurposed some of our new Sweetheart Treat bags to make background paper and used the little stripey banners from the same kit on my card as well. The sentiment is from the new "Follow My Heart" set, whilst the flourish is the one in the "Everything Eleanor" stamp set. I punched some red glimmer paper with my small heart punch, and then used the little scallop circle in Pool Party cardstock behind it. Really this is a quick and simple card... but I love how it turned out.

But there's something else I am wanting to tell you about today... and if you are in need of adhesive right now, then keep reading....

 I'm doing a ONE-DAY-SALE on adhesive! Buy 3, get one free. The only condition is that your free adhesive needs to be an equal or lesser value of the others you choose. Here are some of your adhesives that you can choose from: Snail, snail refill, Sticky Strip, Dimensionals, 2-Way glue pen, Glue stick. (Or go to Pages 174-175 in your Annual Catalogue) You can choose one type or several e.g. you can buy 3 snail refills and get one free. Or, another example, you can buy 3 different types of adhesive, and then get some dimensionals for free. If you are in need of adhesive this is a great little special to get your year off to a good start and stock up! To order click HERE to email me or send me a private facebook message if you are on my Business Facebook Page.  But you need to have your order in with me by 9pm EST Monday 30th December to get in there on time.  Please note this is not a Stampin'Up special.. just a little one day promotion I am doing on my own. 

Hope to hear from you soon!

Linda xx

Saturday 28 December 2013

Sneak Peek of Sale-A-Bration 2014


So you all know it's coming right?  Yep.. its heading into THAT time of year again.....Stampin'Up Australia has its biggest promotion of the year! This year the start date is the 28th January, and then we will also have all of February and all of March to jump on board and get lots of free stuff!

Demonstrators are no exception.. we love free stuff too.. and lucky for us, we get our hands on it before everyone else :-) So I have started playing with mine.... and thought you would like to start seeing some of my creations ahead of time. Sale-A-Bration (SAB) is always so popular, and there is lots to choose from!

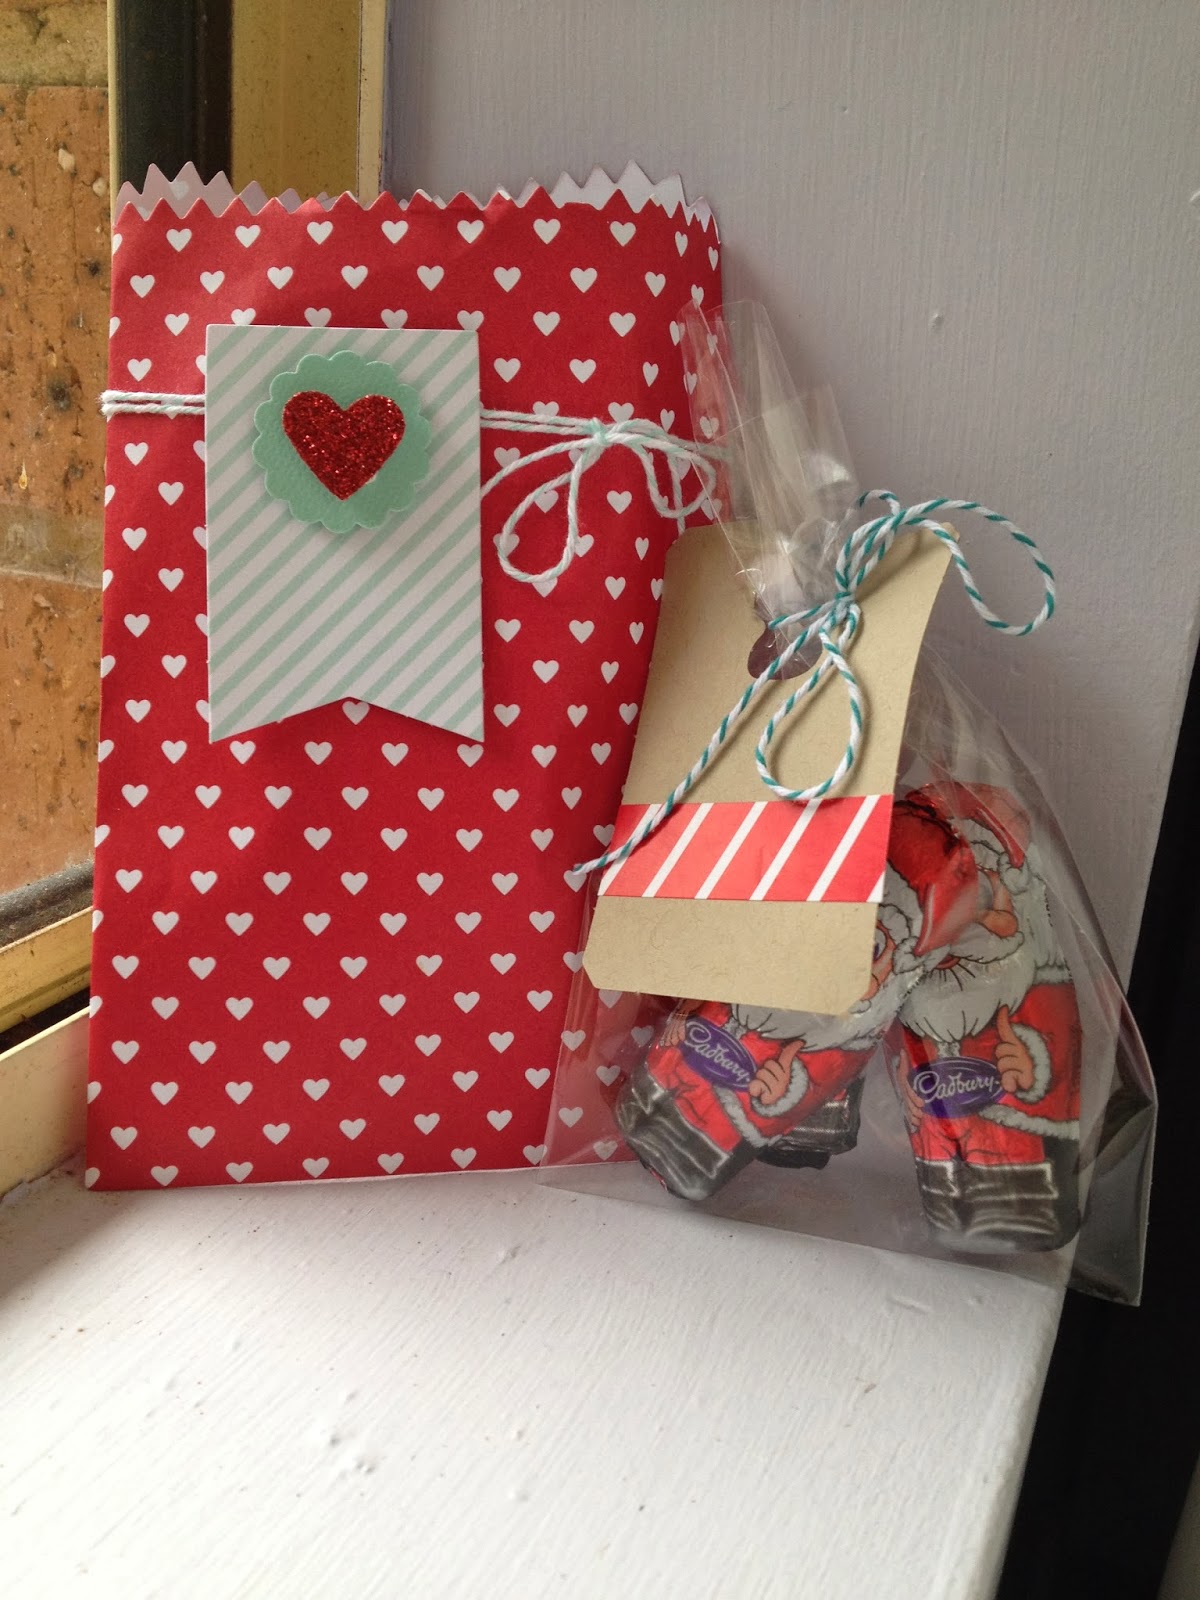
The card you see here is made with the new SAB designer series paper... its called "Sweet Sorbet" and I love the beautiful soft colours!  What do you think??  I'll be back with more cards and projects to show you made with Sale-A-Bration products over the next few weeks, so stay tuned. I also plan to run classes and events in conjunction with SAB - and our new Autumn catalogue also coming out at the end of January.

This year SAB will be slightly different... you will receive a free item from the special SAB catalogue for every $90 you place in orders during this period. And even better hostesses not only get that opportunity, but there is an additional $50 in free product when you host a workshop over $500!  Which is actually pretty easy during SAB.. because everyone wants to get their share of the goodies! So for a $500 workshop/party you will receive $130 in free product.. and higher sales earn even more.

As if that wasn't enough, if you are thinking of joining Stampin'Up as a demonstrator, you will receive an additional $20 of product in your demonstrator kit. That means for only $169, you receive $255 of product... not to mention an ongoing 20% discount. Who wouldn't find that attractive??  It really is the best bargain we have. Not to mention a possible source of income.

If you would like to hold your own Stampin'Up party during SAB, please contact me soon, as I expect the available spots to fill quite quickly. I find that most of my customers like to host workshops or parties at this time, to make the very most of the benefits.

You can contact me by clicking HERE... and we can make it happen for you during SAB 2014!

Friday 27 December 2013

From Paris with Love.... Follow My Heart


So Christmas is over for another year, and so you might be relieved that I am no longer going to be posting Christmas cards almost every day.

I wanted to show you one of the cards I made recently with our brand new set, "Follow My Heart", which features this little Eiffel tower and several other images.  For more details, click HERE, and you can see the full Valentines day offering... but for me, I am a sucker for anything Parisian! So this Eiffel tower is already a new favourite.  On this card I have also used some DSP from the Venetian Romance paper pack, and some Crisp Cantalope Ruffled Ribbon. :-)

Here are the other stamps you can purchase as part of this promotion... or you can see them in the Online Store... click HERE to visit the store.


Tuesday 24 December 2013

Reindeer Noses to wish you a Merry Christmas!!!


So this is not my idea... not even close. I'd seen these online.. I first saw them on Pinterest, and then a bit of research and I tracked them down to a US blog called " The Great Stamp Escape" by US demonstrator Amy Kircher.  She had this idea on her blog a couple of years back, and I have been meaning to get around to it for a really long time! Well this year was the year, and I made my own version of the Reindeer Noses.  We made this as one of our gifts at my Christmas Gift Class. The owl punch has been used to create the reindeer, and I used the "Little Leaves" die to create his antlers. The choccies inside the bag are Maltesers, and Jaffas.

I want to take this opportunity to say a very Merry Christmas to you all... I hope you have a lovely day, wherever you may be spending it, and with whom. I know that not everyone has their loved ones with them, but take the time to remember that we are very blessed and every day is one to be grateful for.

I cant wait to show you lots more creations in the year ahead... and want to thank you for reading and viewing my blog faithfully this past year.  It's because of my awesome customers that I am able to keep doing what I do. Thank you all so much!!!!

MERRY CHRISTMAS!!!

Sunday 22 December 2013

Video Tutorial: Making the most of your Sweetheart Treat Bags


Last week I showed you what I had done with the Sweetheart treat bags (picture below)... well today's video shows you a couple of different ways to use them... and how to repurpose them for cards too.

At the end of the video I mention a little competition that I am running over the Christmas period. Place an order of any size between now and December 31st 2013, and you will go into the draw to win a pack of Sweetheart treat bags - the same as the ones you see here.  And don't forget to keep checking the store every week or so to see what's new in the Clearance rack too. You can visit the Online Store by clicking the "Shop Now" button on this page.

I'll be back soon with more ideas and creations to show you :-)


Friday 20 December 2013

Christmas Frame as a DIY Christmas gift


At last weekend's Christmas gift class I also made these great Christmas frames with my lovely group of girls.  Everyone made one that looked pretty much the same as this - although some people chose to do it landscape rather than portrait... I think both of them looked great.

Its easy to do... just use a frame purchased from any discount store, remove the backing and carefully slide out the glass. I stamped the flourish on the glass directly with White Stazon, and then put it aside to dry while I stamped and cut my snowflakes with the Big Shot.  The letters were also die cut, but from red glimmer paper - although you could use whatever colour you have on hand. I used a little ribbon to finish it off. Then I attached the letters and snowflakes to the glass with glue dots. To finish off the frame, I used a hot glue gun to reattach the glass back into the frame. Voila!  It's done :-)

(I'm so sorry it was a bit tricky to photograph.. and you get to see my outdoor furniture reflected in the glass!)

See... Christmas gifts can be quick, easy, AND effective!


Thursday 19 December 2013

Simple Lattice Christmas Card


Just a quick and simple one for you today.  I finished my last class of the year yesterday, and so today I've been creating some new projects, and thinking about the fact that I actually need to write on the Christmas cards that I made this year!  And I'd better do more than just think about it.. they will need to be in the mail in the next couple of days!

Today's card I made a while back... its just a simple circle window card cut from Pool Party card stock, and then I put some silver glimmer paper behind the window. I placed a the lattice die cut over the top and added some rhinestones.. that's it! Easy peasy...

Back with more for you soon...

Wednesday 18 December 2013

More "Undefined" from Stampin' Up - my rustic Owl :-)


So today was my final class for 2013! Whilst I am glad to have some time now to enjoy the holidays and spend some time with the kids, I am sad that classes are over too.  I'll look forward to them starting up again in January. Stay tuned for a class schedule which will be up here on the blog before Christmas :-)

Today was my "Undefined" class... and we played with our kits, and learned how to carve stamps from scratch. Whilst there is certainly satisfaction in carving your own unique stamp, I have to say it also gives me an appreciation for how beautifully our catalogue stamps are made. I know its a different process entirely.. but there is a lot to be said for perfectly drawn, deeply etched stamps. Thank you SU for making stamps that are so high in quality and ready to use!

Having said that.. carving your own stamps is FUN! Everyone at my class got to choose their own design, and the trick is to choose a very simple shape for the first attempt.  I thought everyone did an amazing job for their first try, and they got to make a card with it too.

Here is the little owl I made in today's class, and then I stamped quickly the card you see here. I think I might do some more owls as I do love them. :-)

Undefined Stamp Carving - A simple Heart


Here is another simple card I made up with one of my first attempts at stamp carving with the Undefined Stamp carving Kit.  As I didn't want to bite off more than I could chew, I kept it very simple.  I strongly suggest that for your first stamp or two you stick with very simple designs or geometric shapes.

Once I had carved my heart, I stamped it with Black Stazon ink onto Whisper White card stock, and then sponged 2 different blues (Pool Party, and Bermuda Bay) over the top. I'm actually quite happy with how it turned out, even if it is very simple.

I am actually running a class with the Undefined kit later today, Wednesday 18th December. If you find yourself with a few spare hours, I have one spot left. The class includes the full Undefined Kit for you to use, and the class price is $40 (which means that the class itself is only $5 as the kit by itself is $35!)  If you would like to join us you can email me, or contact me on my mobile which is 0412 375 552.


Monday 16 December 2013

Clipboard Gifts for Christmas


How cute is this little clipboard gift?!  This is one of the projects from my annual Christmas Gift class that was held last weekend... probably my favourite project of the 4 we made.  I covered the plain clipboard with some of the DSP from our "Sweater Weather" collection (available in our current Holiday catalogue for $18.95)... added cardstock in Crumb Cake and Soft Suede as well as some Burlap Ribbon tied around the top. The stamped sentiment is from the "Chalk Talk" set.  The numbers are die cut with the Big Shot from Soft Suede Cardstock. I tied Seam Binding ribbon around the pencil.  Such a simple project.. but it would make a lovely gift.

Easy to make your own - I am thinking I might make this up for this week's video?  Stay tuned....


Saturday 14 December 2013

Sweetheart Treat Bags - for Christmas or anytime


How cute are these Sweetheart Treat bags?  Event though officially they have been released as part of our Valentines Day line, I think they work all year round, and are just so cute and useful!  I've decided to give mine a Christmas feel by adding some Chocolate Santas (and I bagged those up in a cello bag and tag from the Real Red Goodie Gear Simply Created set - makes little gifts so EASY).

But I really think these Sweetheart Treat Bags are the star of this particular show! Your Sweetheart Treat Bag kit includes 12 of the heart sacks, 12 die-cut labels, and 12 pre-cut pieces of Bakers Twine. All of that for $8.95!  They are available right now - either by contacting me, or by visiting the ONLINE STORE. Don't forget to look at the store over the next week as more items will be added to the Clearance Rack sale too.

To see what else is available from our new Valentines Releases click HERE.  There are new stamp sets, Card and Envelope sets, and little Monster gift cards! Super cute!


Thursday 12 December 2013

Making Christmas Bon Bons (AKA Crackers) with the Envelope Punch Board


This week was one of my stamp club get togethers, and in the case of this particular club, it was our last get together as a club :-( So we made it extra special... and celebrated another awesome year together with a special Christmas theme. We made the Bon Bons you see in the above (and below) picture.. they are so easy to make with the Envelope Punch board! I used some of our Winter Frost Speciality Designer series Paper, and decorated them with the Festive Flurry stamps. Aren't they cute?

Below is a close up of the decoration on the outside. We filled them with choccies and silver tinsel. :-)

So... I am going to be starting another new stamp club in 2014.  If you would like to be part of one of these clubs, please email me and I can put your name down as interested.  If we have 5 or more people then we have enough to go ahead with the club... ideally I like to have 6 people. I usually hold the club events every second month, and each club member takes turns at being the "hostess".  This means all the club get togethers are held at my place, and the hostess brings lunch when it is her turn... but she also gets the free products on the order that month! So during the year, everyone gets to be the hostess once... and when its your turn, you will get some great freebies. Your only obligation is to spend $50 or more at each club day. So thats spending a minimum of $50 every second month... and its a great way to build up your supplies, whilst also learned new ideas and techniques at each club event.

I currently have 3 day clubs, and one night club. I am happy to run more of either night or day events if we have enough people to do so.

Just email me if you want more information.. or to put your name down. Looking forward to another year of Club in 2014.


Wednesday 11 December 2013

This week's video - Simple Masking Technique


This week's video shows you how to create a very easy card using the Masking technique.  I popped up the card that I made a few days ago.. but just in case you needed to see it again....:-)


Tuesday 10 December 2013

Last minute Spots left for tonight's Christmas Stamp-A-Stack...


You might remember this card - it's exactly the same as one I posted a few days ago.. just different colours. And its one of the two designs we will be doing at tonight's Stamp-A-Stack class.  (The other is the card I posted yesterday.. so check that one out too) Apart from the colour change, I also did the Sentiment using my Stamp-a-ma-Jig to create a shadow.  I love that effect.

I have two spots left for tonight's class if anyone wants to come along. Last week was meant to be my last SAS for the year, but by popular request I am running just one more... tonight! (Tuesday 10th December here on the Central Coast, NSW)

So if you find yourself with a spare night, and cards still to make.. come join us! You will make 6 cards (3 each of two different designs) for a cost of $20.  I am looking forward to it!

(By the way.. our Clearance Rack sale is now on! Check out my Online Store for the clearance items and grab a bargain)

Here's the full card:


Stampin'Up Australia's New Clearance Rack


So.. I've just been reading what Stampin'Up's new Clearance Rack is all about... and I'm a little bit excited. Rather than a sale.. the Clearance Rack is going to become part of our Online Stores.  You can access the Clearance Rack at any time.. but all the products are First in, best dressed... as they are only available until they sell out. And once they are gone.. they may be replaced with a new item. So there should always be cheap stock available in the Online Store.

Here are a few basic points to remember:


  • All items were previously discontinued, and are only available in the clearance rack as there is a surplus of those items and they need to be cleared.
  • Once they are sold out, that's it
  • Items are marked down.. some as much as 80%!
  • You can order through me... or to make sure you don't miss out... order online!
  • If you place an order Online it will be delivered directly to you
To go to the store and see whats available.. click HERE, or use the "Shop Now" button on this page.  If you have questions, or need any help at all, please contact me

Monday 9 December 2013

Ornament Keepsakes with Washi Tape


I will be really truly sad when we no longer have the Ornament Keepsakes stamp set (and matching framelits) available for sale. Even though they are no longer in our current catalogues, you can still purchase them from your Stampin'Up Demonstrator at the current time.

Today I was feeling like using some Washi Tape, and pulled out the "Season of Style" Christmas-themed Washi.  So this card started out with the idea of using Washi tape.. and look where I ended up! It's always amazing to me how creativity takes you on journeys that you didnt expect to take. :-) But thats half the fun!

And DONT FORGET! Our Clearance rack sale starts tomorrow! The have told us that they plan to post the list just after midnight.. if they do I want to be able to pop the link on here for you to see what awesome specials are available ASAP. Yes, I know we don't know whats going to be on sale... so how do I know its going to be awesome? Because they just always are... I love these sales. Don't forget you can email me your order OR even better.. use the "ONLINE STORE" right here on the blog page and order it to come to you directly. This is going to be the best way to ensure that you don't miss out on whatever is available!

Here's to some fantastic bargains!

Below is the full card for you :-)


Friday 6 December 2013

Embossed Christmas Star


I am loving this Christmas Star stamp (single stamp rrp $16.95), and have made a few cards with it this week. The card today is just simply embossed in white, on Crumb Cake cardstock. I cut a few stars from Champagne Glimmer paper with the Star out of the Circle Thinlits die pack, and used dimensionals to attach them. Then embossed the sentiment in Gold Embossing powder. The edges of the paper are swiped with some white ink, and the corners rounded off.  Just a simple but effective card. Hope you like it.

Here is the full card below.

I am a bit overdue for a new video this week... so I'll be back very soon with that for you :-)


Thursday 5 December 2013

Get ready... we have a new Clearance Rack Sale coming next week!


For those of you that were around last year... you might remember the Clearance Rack Sale that was held in December and January. It was fantastic because discontinued items were put up for sale at huge discounts... and lots of my customers cleaned up!

What wasn't so great was the fact that there was a bit of a frenzy on many of the items... so by the time some products got ordered... they were already out of stock! Fantastic for those that got in quick.. but for those that had hesitated... well the news wasn't as good. 

So.... this year the clearance rack sale starts on December 10th... yep that's NEXT WEEK!!!  I have a few suggestions for you based on what I learned from last year. 

1. Dont wait! If you see something you want, grab it while you can. This isn't a joke... things will sell out so fast it will make your head spin around!  That's what happened last year anyway!

2. This year the savings are even bigger.. with some items marked down by 80%... so yes there are definitely bargains to be had. And no, I have no idea what items will be on sale yet.  But we will know on the 10th as to the first round of available products. 

3. Online Ordering is the best way to avoid disappointment.  You are welcome to email me, or phone your orders through... as you did last year. BUT if you want to make sure you don't miss out... register for Online Ordering... and order it yourself! This means you don't have to wait for me to receive the email and process the order... you can do it right there and then, and you are less likely to miss out on what you want. 
To register for Online Ordering, click on the "Shop Now" link on this blog. It will take you directly to my online shopping page.. my name and details will be in the top right hand corner of the page. From there you enter your details... and you can start shopping whenever you are ready. Postage is added to your order... the minimum postage is $5.95. 

As more details are released I will update the information here.  And on the 10th I will post the link to the clearance items here on my blog as soon as I have them.  Or you can visit the Online store (the "Shop Now" button) and they will be listed there too. 

Today I've also posted a photo of one of the cards we made at my Stamp-a-Stack earlier this week.  Its using the stamp "Christmas Star" which is one of our single stamp offerings this Christmas.. If you would like to see what other Single Stamps we have available click HERE... these stamps will only be available until the 31st January.  Here are the images to take a peek at: 


Tuesday 3 December 2013

Framed Christmas Art - Sneak Peek


Just a "Sneak Peek" for you today... of one of the items we will be making at my annual Christmas Gift Class. This year we are making 4 projects at the class.... all handmade items that would make lovely Christmas gifts.  This is one of my final events for 2013, and I would love to see you there... there are still a few spots left at the time of writing this.

I am keeping numbers relatively low this year to ensure that I have plenty of time to order the additional supplies that we will need. Being Christmas of course we will also enjoy a nice Christmassy afternoon tea :-)

Here are the details:


IT'S BACK FOR ANOTHER YEAR!The ANNUAL CHRISTMAS GIFT CLASS!
Come and make 4 beautiful handmade gifts to use for Christmas this year. Numbers for this class are limited.  Cost is $40 and you will go home with 4 gifts. All materials and refreshments provided.  Address details are supplied after you book in to the class. 
Saturday 14th December @ 2pm


To reserve your spot in the class please Contact me.  Looking forward to seeing you :-)

Monday 2 December 2013

What I wish I could do today....


Many of you would already know that my fiancee, Paul, lives over in the US. So we spend a lot of time every day talking and planning our lives together every chance we can. Thank goodness for Skype, which is free!

So I had to buy the "Around the World" stamp set.. (well actually I didnt buy it... I earned it for free as a demonstrator) but it makes very cute cards... and sometimes they make me just a little bit sad too.. I miss my guy!  This card perfectly shows what I wish I was able to do right this minute :-)

But we are busy planning our next trip... hopefully in 2014 we will get to catch up more than we have previously.  I am really hoping to make the next Stampin' Up Australia incentive trip too.. as that will take me back to the US again in May, and that would be awesome! For that trip though I am hoping to be able to take my kids as well.... its all very exciting. But I have a LOT to do to make that happen... anyone want a workshop during Sale-A-Bration??

I hope you enjoy today's card... and I will be back with more soon. :-)

Saturday 30 November 2013

Another simple Thinlits card


This time I've made another Christmas card with my Circle Thinlits die (rrp $55.95)... its actually no more difficult to make one of these than a regular card.  I used Naturals Ivory paper ($12.95 for 40 A4 sheets), and then added some DSP from the Season of Style paper stack ($11.95 for a pad of 40 sheets).  The ink is Cherry Cobbler ($9.95) and I stamped an image from the Christmas Collectibles stamp set ($37.95 for wood, or $29.95 for clear), before punching the image out with the matching punch ($27.95).  The Champagne glimmer paper ($6.95 for a pack of 2 12"x12" sheets) is behind the main image on the front, cut with the 2.5" circle punch ($29.95).

This card is actually one we are making at this week's Stamp-a-Stack.  I had planned that this would be the last SAS of 2013... although a couple of people have asked that I run another one... if there is enough interest I will do that, so let me know.

Dont forget if you want to make any purchases you can do that right here by clicking on the "Shop Now" button.  Items are shipped straight to you wherever you may live in Australia for a low postage charge.

I hope you are having an awesome weekend whatever you are up to. Dont forget to like my Facebook business page - here is the link if you want to see what else I am up to :-)... just paste it into your browser.
https://www.facebook.com/lindastampsnstuff


Thursday 28 November 2013

By Popular Request: Minion Card Video Tutorial

Last week I posted my "Minion Card"... and it proved so popular on Pinterest that I've decided to do a follow up for my video this week.. here is the Video Tutorial!

Any items you wish to buy can be purchased from my online store right here on my blog. Just click the "Shop Now" button.  Items can be sent anywhere in Australia for a low shipping charge.

So so easy to do! Enjoy!


Wednesday 27 November 2013

Ooooh.. I won a prize!


Don't you just love to get happy news?  This week I had a phone call from Clare at Stampin'Up Australia's head office... to tell me that the card I submitted for World Card Making day last month had won a prize! Yes, I know there were quite a few other winners, but hey, I WON A PRIZE!!!!

What prize did I win?  Well it was a pack of Christmas Washi Tape ("Season of Style") and one of our new Rotary Stamps ("Naughty and nice This and That"). Not bad for a nice evening in designing pretty cards.

I've posted this card on my blog before, but thought I would post it again in case you missed it. Truly such a simple card, but I find quite often that those are the ones that get the most attention.  The pop of red doesn't hurt either.... I wonder if thats what did it?  And the silver embossing against the black is quite dramatic.

Back soon... to post my weekly video for you.....

Tuesday 26 November 2013

Ornament Keepsakes in Gold


I do love a simple card. And in these lovely soft colours too. 

Dont forget that we do still have some of last year's stamps available in our carry over flyer... Ornament Keepsakes (and the matching framelits) are still available for sale.. but not for much longer.  I stamped the ornament here in Gold Encore Ink. The dotty paper is from the "Season of Style" paper stack. 

You can purchase these or any other products from Stampin'Up Australia by clicking on the "Shop Now" button on my blog right here. 

Enjoy the card :-)  


Monday 25 November 2013

Off the grid with our Magnificent Maple


You might have noticed that I have been playing with our Magnificent Maple stamp a bit lately. Some stamps are just really easy to use.. and this is one of them. You can use lots of different techniques with it too. But I've gone for pretty simple here... just inked it up in Tangerine Tango, and then rolled the edges of the stamp with the darker colour (Old Olive). (Thats the "rock and roll" technique if you haven't heard of it before).

Then I inked up my "Off the Grid" stamp and stamped it in Gold pigment ink (I could also have used Versamark ink) and then heat-embossed it with Gold Embossing Powder. The splatter of gold in the background is made with one of the stamps from the "Gorgeous Grunge" set.

Dont forget if you ever need to make any ink or paper purchases you can get them right here on my blog by choosing the "Shop Now" option.  Orders are sent directly to you.. no matter where in Australia you might be.  Stampin'Up Australia keep us supplied with lots of beautiful (and co-ordinating) papercrafting tools and products... I love what they have to offer!

I hope you enjoyed today's little card xx


"Undefined" goes a little bit Retro..


A bit on the bright side for me.. BUT this was my first attempt at Stamp Carving with the Undefined Stamp Carving kit. I made this stamp back in July when we were in Utah... on the day that we visited Head Office they gave us all an Undefined kit and we got to have a play with it. Way more fun than I was expecting it to be! But then it reminded me of when we did Linocutting back in High School, and i loved that too.

This card has a retro flavour I think.. the washi tape and the words have that feel about them. I stamped the Sunset (or is it Sunrise?) with Black Stazon ink, and then sponged inks over the top.. daffodil delight, Tangerine Tango and Melon Mambo.

If you think you'd like to try your hand at Stamp Carving, then come along to my "Undefined" class that I will hold in December.  Here are the dates:

Tuesday 17th December @ 7.30pm

or

Wednesday 18th December @ 11am


 You will also receive your own Undefined kit as part of this class. For both the class and the full kit you will only pay $40. (Which means your class is actually only $5!)
Please let me know ASAP if you would like to attend, as i will need to pre-order the kits before the class date.

If you have ever wished a particular stamp existed to suit your needs.. this is your chance to make it. You have total control of what you will create :-)


Saturday 23 November 2013

Thank you with Magnificent Maple


Just a quick and simple card for you today. Just a couple of stamp, inks, cardstock and a punch.  But still effective. :-)

Hope you are enjoying your weekend, wherever you are!

Friday 22 November 2013

Christmas Wreath with Daydream Medallions


One of my favourite things is to repurpose stamps for something different than their original intended purpose. Today's card is an example of this. I used the Daydream Medallions set, cut with the Floral Flamelits, to create a Christmas wreath. Its not the first time this has been done of course, but I wanted to show you my take on the idea.

Really this is a very simple card. If you would like more information, or to purchase any Stampin'Up products, please either contact me, or you can visit my online store and have the products sent directly to your door for a small postage charge.

Have fun, and i'll be back with more for you very soon!

Wednesday 20 November 2013

This week's Video: How to make a Simple Box with the Envelope Punch Board


Today at Stamp Club we made these awesome boxes full of gift cards. I'm not going to show you the gift cards today as they are for my stamp clubs this month, but I thought you might like to see how I made the box.  It's made with the envelope punch board... how handy is this awesome tool... and not just for envelopes as you can see.

So this week's video shows you how to make the box.  If you think you would like to own your own Envelope Punch Board (or any other Stampin'Up product for that matter) click over on to the "Shop Now" button on this blog to visit my online store.  I will be running Stamp Clubs again in 2014, so if you would like to join one, please let me know and I will find a spot for you. Just contact me, and join the fun in 2014.

Enjoy this week's video, and I'll be back soon with more for you. :-)

Tuesday 19 November 2013

Midnight Muse and Silver


Just a quick card for you today.

I love how crisp Midnight Muse and Silver look together. Very clean. Simple.

I might have to make some more Christmas cards with this combo :-)

This week has been extra busy... I've had a couple of lovely groups of ladies to get creative with.  And tomorrow I have one of my day stamp clubs where we are making a cool little box with the Envelope Punch Board, as well as matching cards to go inside. I do have quite a few scheduled events and classes coming up over the next month so check the class schedule (over on the right hand side bar of this blog) to see what classes may suit you.

And today I got to peek at the Sale-A-Bration offering beginning in January! Oh my goodness! Such a great selection of free products, as well as extra hostess benefits for those hosting parties in the New Year. But dont delay... book yours soon as I know I will be starting to get booked out over the coming weeks.

To book in to any event, or to book your own party or workshop.. CONTACT ME.

Enjoy today's  card... I will have a new video coming up for you very soon.

Thursday 14 November 2013

The trick with the Card Thinlits Dies


I have a problem with the Card Thinlit dies. When you use them to cut out your card shape (which cuts and scores at the same time - AWESOME!) you are left with a card that, though it looks great, has little space to write your greeting on. This is fine if you dont have much to say, or are happy to write on the back... but what if you dont want your greeting to be visible?  

Well I have a way! This card show you it looks when you add on an extra flap to the card.. so that when you open it, there is plenty of room to write inside.  The following picture show you the card open: 


If you want more details on how to make the extra flap with the thinlits dies, click on the video link  below to watch the video I made.. it explains it better than I could do otherwise. :-)


Dont forget if you would like to order the Card Thinlits (or any other Stampin'Up products) you can visit my online store by clicking the "SHOP NOW" button above.  Products can be shipped anywhere in Australia for a low postage charge. 

I hope you like today's card, and I'll be back with more soon. 

Linda xx

Wednesday 13 November 2013

Minion Card!

group

How cute is this?  It turned out really well.. and we are making it in my Card Thinlit technique classes this week.  Last night's group really enjoyed it and I have another group coming to make this one (and two other cards) today. I think its a great way to use the Circle Thinlits die, and the rest of the bits are simply made with punches. Hope you enjoy it too.

Here are the cards open...


If you would like to make this card (or any other) at your own workshop, Contact me and we can book a date!

Tuesday 12 November 2013

Video Tutorial - Making a Christmas Angel Decoration


Today I wanted to show you how to use the new Bow Die to create the cutest little Christmas Angel you ever did see. You could put her on a card, give her as a gift, or hang her on your Christmas Tree.  This is not my creation, as I first saw Vanessa Webb demonstrate this at the Penrith Craft Festival last week. (And I think she found it online too)  But this is my version of it. Hope you like it :-)


Monday 11 November 2013

Red and Gold for Christmas


I've kind of been overdosing on blue and silver this Christmas. But my next favourite colour scheme for Christmas is this one... Gold and red.. specifically Cherry Cobbler as it is such a rich, deep red.  I made up this card this morning and I quite like how it turned out for a very simple idea.

Here's the full card:


Saturday 9 November 2013

Gold and Burlap... together at last!

How good does Gold, Vanilla and our new Burlap Ribbon look?  Yes, I did say "Burlap"... even though this is a very American word (we would say "Hessian" here) that is what it's called in our current Holiday catalogue from Stampin'Up Australia.  So to save confusion I will call it that too... otherwise how would you find it if you wished to purchase it?

I cut the ribbon ($13.95) in half lengthways, and then frayed the edges a little.  I have also used some of our Gold Foil ($6.95) and embossed it with the Pretty Print embossing folder ($13.95) though the Big Shot. The main poinsettia is from the Joyful Christmas stamp set (wood - $39.95, clear - $31.95), and the sentiment if from the "Christmas Messages" set (wood - $49.95, clear - $39.95).  I heat embossed both the sentiment and that outline of the flower in gold embossing powder ($8.50), and added a punched circle of Champagne glimmer paper ($8.95) to the flower's centre. The dotty paper is from the "Season of Style" Paper stack ($11.95).  And finally I sponged a little Soft Suede ink ($9.95) over the flower petals.

To order any of the products you see here, visit my online store by clicking the "Shop Now" button on this page right here. Or you can email me.  Orders are shipped absolutely anywhere in Australia for a low postage charge.

Enjoy the card and I'll have more inspiration for you soon :-)

Friday 8 November 2013

Winter Frost Flip card


I am loving all the lovely (and FAST!) cards you can make with the new Thinlit Card dies.  These are so easy to make its ridiculous! :-)  This one uses the gorgeous "Winter Frost" specialty paper from Stampin'Up.  I also used the Festive Flurry dies and stamps, and the embellishment in the middle is one of our "Frosted Finishes" embellishments.  I do love a sparkly Christmas!

I do still have spots in next week's technique class to show you how to use them.  Please note that the class is discounted for anyone that has purchased their Thinlit dies from me prior to the class. At time of writing, I only have a couple of spots left in the daytime class.


Dates are:

 Tuesday November 12th @ 7.30pm

or

Wednesday 13th November @ 11am

If you preorder your thinlits before the class, your class will only be $10.  Otherwise this class is $25 and includes all materials to make 3 projects.  


The numbers to purchase the dies are:
ItemDescriptionPrice
133479Label Card Thinlits Die$55.95 AUD/$67.95 NZD
133480Circle Card Thinlits Die$55.95 AUD/$67.95 NZD
You can order Online (Using the "Shop Now" button on this page) or you can send me an email to place your order.  The Thinlits wont be back in time now before the class, but at least you will have them coming to enjoy after you do the class and know how to use them. :-)

Here's the sentiment I stamped inside the above card: